Using MCP
Connect to Remote MCP Servers
Learn how to connect Claude to remote MCP servers and extend its capabilities with internet-hosted tools and data sources
Remote MCP servers extend AI applications’ capabilities beyond your local environment, providing access to internet-hosted tools, services, and data sources. By connecting to remote MCP servers, you transform AI assistants from helpful tools into informed teammates capable of handling complex, multi-step projects with real-time access to external resources.
Many clients now support remote MCP servers, enabling a wide range of integration possibilities. This guide demonstrates how to connect to remote MCP servers using Claude as an example, one of the many clients that support MCP. While we focus on Claude’s implementation through Custom Connectors, the concepts apply broadly to other MCP-compatible clients.
Remote MCP servers unlock powerful possibilities for extending Claude’s capabilities. As you become familiar with these integrations, you’ll discover new ways to streamline your workflows and accomplish complex tasks more efficiently.
Understanding Remote MCP Servers
Remote MCP servers function similarly to local MCP servers but are hosted on the internet rather than your local machine. They expose tools, prompts, and resources that Claude can use to perform tasks on your behalf. These servers can integrate with various services such as project management tools, documentation systems, code repositories, and any other API-enabled service. The key advantage of remote MCP servers is their accessibility. Unlike local servers that require installation and configuration on each device, remote servers are available from any MCP client with an internet connection. This makes them ideal for web-based AI applications, integrations that emphasize ease-of-use and services that require server-side processing or authentication.What are Custom Connectors?
Custom Connectors serve as the bridge between Claude and remote MCP servers. They allow you to connect Claude directly to the tools and data sources that matter most to your workflows, enabling Claude to operate within your favorite software and draw insights from the complete context of your external tools. With Custom Connectors, you can:- Connect Claude to existing remote MCP servers provided by third-party developers
- Build your own remote MCP servers to connect with any tool
Connecting to a Remote MCP Server
The process of connecting Claude to a remote MCP server involves adding a Custom Connector through the Claude interface. This establishes a secure connection between Claude and your chosen remote server.1
Navigate to Connector Settings
Open Claude in your browser and navigate to the settings page. You can access this by clicking on your profile icon and selecting “Settings” from the dropdown menu. Once in settings, locate and click on the “Connectors” section in the sidebar.This will display your currently configured connectors and provide options to add new ones.
2
Add a Custom Connector
In the Connectors section, scroll to the bottom where you’ll find the “Add custom connector” button. Click this button to begin the connection process.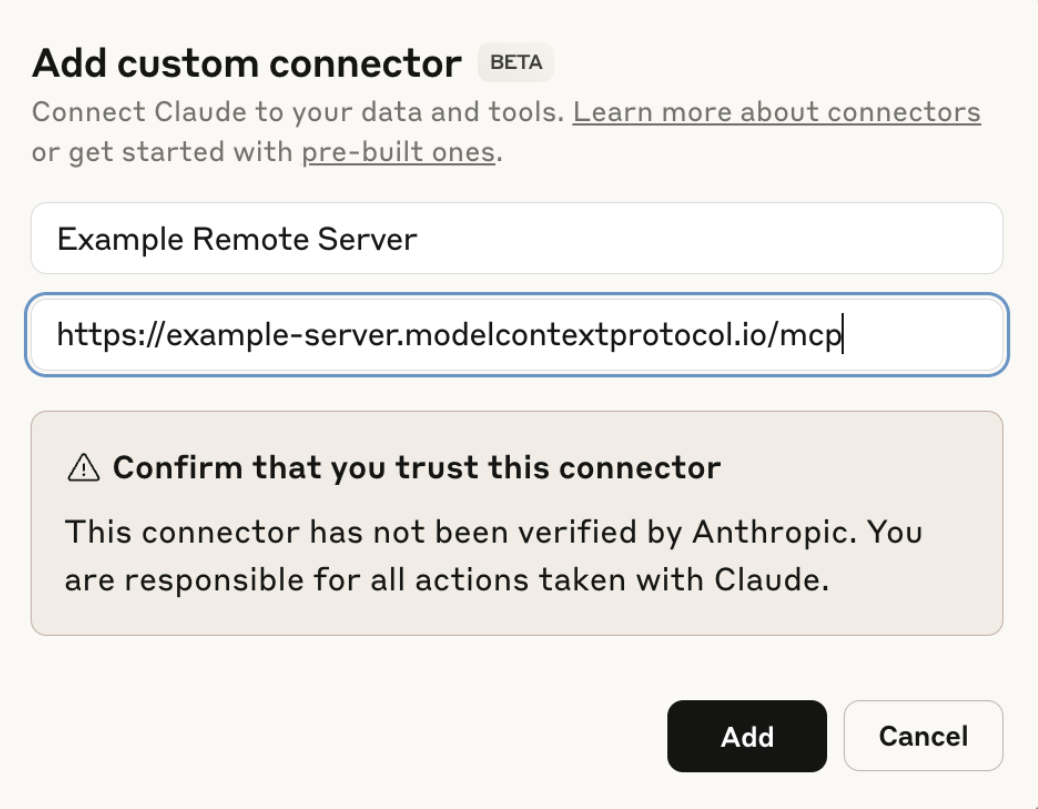 A dialog will appear prompting you to enter the remote MCP server URL. This URL should be provided by the server developer or administrator. Enter the complete URL, ensuring it includes the proper protocol (https://) and any necessary path components.
 After entering the URL, click “Add” to proceed with the connection.
3
Complete Authentication
Most remote MCP servers require authentication to ensure secure access to their resources. The authentication process varies depending on the server implementation but commonly involves OAuth, API keys, or username/password combinations.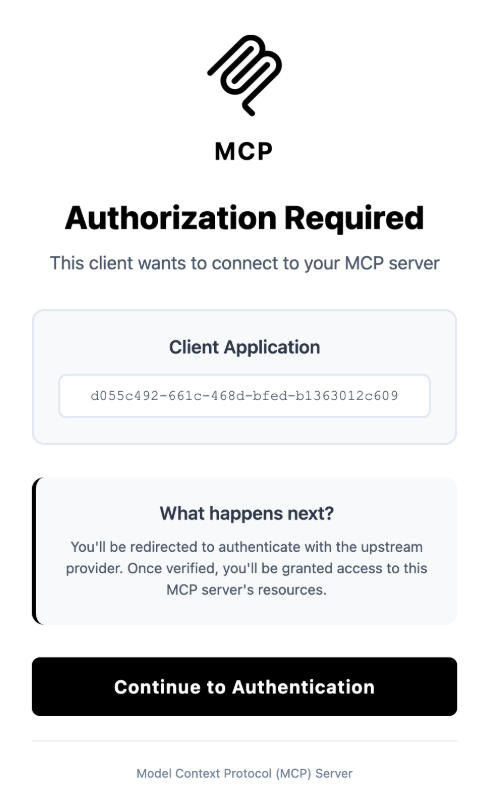 Follow the authentication prompts provided by the server. This may redirect you to a third-party authentication provider or display a form within Claude. Once authentication is complete, Claude will establish a secure connection to the remote server.
4
Access Resources and Prompts
After successful connection, the remote server’s resources and prompts become available in your Claude conversations. You can access these by clicking the paperclip icon in the message input area, which opens the attachment menu.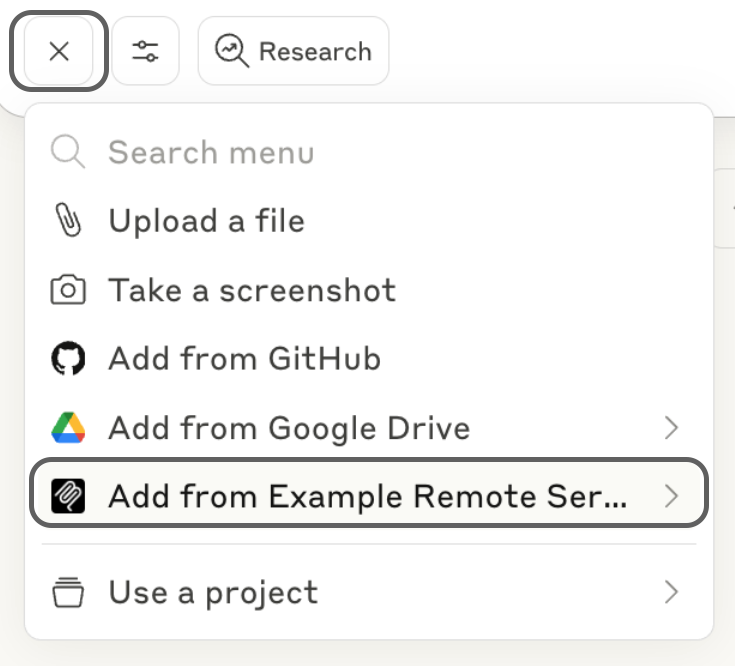 The menu displays all available resources and prompts from your connected servers. Select the items you want to include in your conversation. These resources provide Claude with context and information from your external tools.
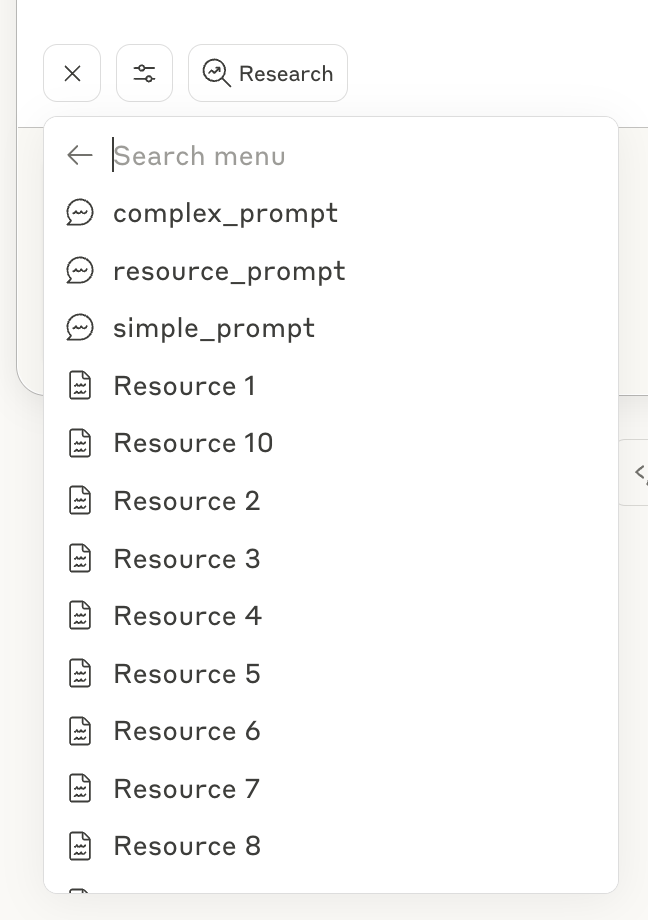
5
Configure Tool Permissions
Remote MCP servers often expose multiple tools with varying capabilities. You can control which tools Claude is allowed to use by configuring permissions in the connector settings. This ensures Claude only performs actions you’ve explicitly authorized.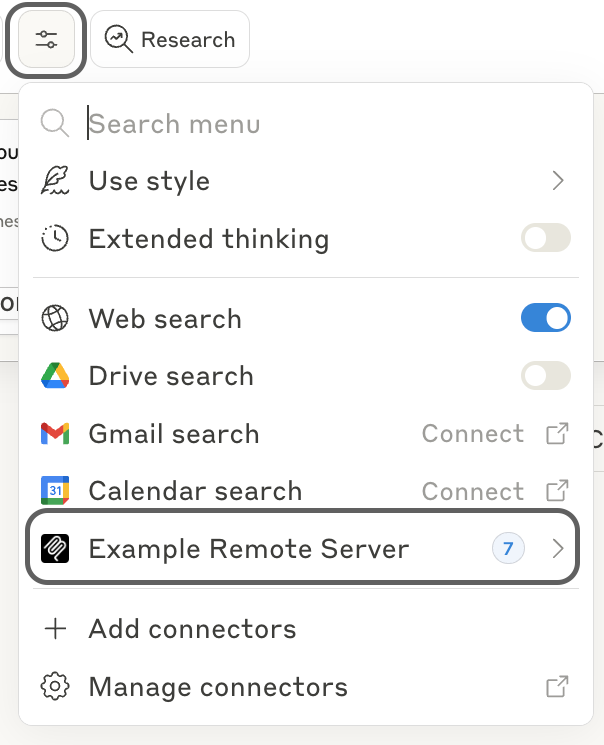 Navigate back to the Connectors settings and click on your connected server. Here you can enable or disable specific tools, set usage limits, and configure other security parameters according to your needs.
Best Practices for Using Remote MCP Servers
When working with remote MCP servers, consider these recommendations to ensure a secure and efficient experience: Security considerations: Always verify the authenticity of remote MCP servers before connecting. Only connect to servers from trusted sources, and review the permissions requested during authentication. Be cautious about granting access to sensitive data or systems. Managing multiple connectors: You can connect to multiple remote MCP servers simultaneously. Organize your connectors by purpose or project to maintain clarity. Regularly review and remove connectors you no longer use to keep your workspace organized and secure.Next Steps
Now that you’ve connected Claude to a remote MCP server, you can explore its capabilities in your conversations. Try using the connected tools to automate tasks, access external data, or integrate with your existing workflows.Build your own remote server
Create custom remote MCP servers to integrate with proprietary tools and
services
Explore available servers
Browse our collection of official and community-created MCP servers
Connect local servers
Learn how to connect Claude Desktop to local MCP servers for direct system
access
Understand the architecture
Dive deeper into how MCP works and its architecture